The idea is to wander around your house noting all the things that need something doing to them. And then pick just a few as priorities. You can find it on the Apartment Therapy website HERE
 |
| This is the newly installed utility area. Very cluttered. I need some quick wins. |
 |
| This is my quick win! Two wire suction caddies - one rectangular one corner and ta da! Far less cluttered and easier to keep clean |
EVERYTHING!
However, that's not terribly constructive. Knowing I was going to do the January Cure I've been sort of keeping a list since I moved in and staring using the space. When I say sort of, there were a variety of lists from different times and about different things as they occured to me over the first few months.
So last month I collated all the lists into
- a page per room
- 3 columns per page - (a) things I can do myself, (b) things I need help with (from family or carers) and (c) things that need money: because I need to buy them or I need to pay someone to do it.
I've done (well I say done, I ran out of steam in January but plugged on over the months) the Cure two times before, both at the Alnwick house, and it was lovely when I was moving out to look at the lists for both years and realise that actually, in that time all the important stuff had been done! AND in time for me to live with it for a bit too!
That past experience has helped a lot! My list ranges from finding permanent homes for straws, pencils, craft stuff, little things, to working out where the furniture goes best to be easy to get to and use and also looking nice (bit tricky when your living room is mostly filled with your bed!), to knowing there's some decor I either want to or need to change, right up to getting new windows and making sure the external brick work that's spalled is done before the house starts suffering.
So - a mighty list indeed! And every room needs something doing that falls into those 3 categories.
However the most unresolved and 'not working for anyone' area is the Utility bit.
 |
| Utility Lean To before I bought the house - Love the blockpaving and bamboo! |
This is the lean to element of the house, it has a back door on one side, a patio door and boiler cupboard on the other. It has to house my shoes, laundry basket, seating because it's far far away from the living room so I need somewhere to rest, and also a panapoly of cat stuff - water and food bowls for both, water fountain as well as laundry baskets and sundry miscellaneous stuff I can't work out where else to home.
Then there's a step down to the washing machine and WC area.
So the Utility is my Project for this January Cure.
We've already made a start on it. There was a gap between buying and moving in - partly because there was a bit of work to do that would be easier without all my furniture and clutter in the house (brand new radiators in every room for a start!) but also because my care package took a while to be put in place. We also created a Utility area so that I no longer have to share a sink and my toothbrush with cat paraphenalia. Hurrah!
What it looked like when I bought the house:
So. When I bought the house, the previous owners used the space to do ironing in, and down the step, had their washing machine, dryer and fridge freezer.
It looked like this - I do like the dark blue and white, and she had put a rail up in the open doorway between the main bit and the washing machine bit, to hang her ironing on, I'm finding that very useful! Lovely cement/ceramic tiles on the floor, but ooo they are hard and cold to the feet after my lovely softer warmer cork floor I had installed in the last house.
 |
| Previous Owners had it like this |
The previous owners had one end of the kitchen like this - an enormous range cooker, an undercounter fridge and two cupboards.
 |
| Previous owners had range cooker and two cupboards and fridge space under the side window |
Work done before I moved in:
The parentals found a very reliable firm Lockwoods locally, and they asked them to
- Move the cupboard from under the side window in the kitchen to where the previous owners had their fridge freezer
- Install a single sink with drainer with taps that I can handle by myself on a bad day (so flippy rather than turny ones) on a counter top
- Install a splashback
- Install a cat flap where the outlet had been for the previous owners' dryer.
- Plumb in an outside tap (makes it easier for me) and move the chaos of plumbing pipes from over the years into a single set of tidy pipes inside and out.
- Lay the spare flooring tiles in the kitchen where the cupboard had been removed (so lucky there were just enough!)
 |
| Cat Flap hole at the back, just needed to be one brick higher |

Final step, could the men install my washing machine for me please? oh but, I said, oh, we can't plumb in the washing machine yet can we, this tile is wibbly on the floor where the feet will be. Can it be glued down?
Then it went a bit pearshaped....
Because when he lifted the tile preparatory to sticking it back down again. Arghhhhh! The grouting had failed and the previous owners' washing machine had had a very slow small leak for a considerable time. The flooring underneath the tile was rotten. Ack!

So the boss came round, sucked his teeth, shook his head, talked big numbers if it was the whole section of house, did some thinking, and eventually, we all had cups of tea and decided to bodge it, lift only what we had to, chamfer in a new piece of flooring board, regrout, leave twice as long as usual to set, and, fingers crossed, it would last a few years.
Great! Except the rot went UNDER the newly installed cupboard from the kitchen. Bah! so that had to be emptied so he could gently shift it upwards a tiny amount to get at the corner of the tile under there, and he needed space to work and suddenly my Utility became a death trap for the unwary staggerer.
 |
| It always gets worse before it gets better! |
Project Utility - Stage One Complete
However it all went splendidly well after that, the washing machine was installed, the solvent based glue from the splashback stopped stinking and the cat flap was working well.
 |
| Hurrah! all done! |
One thing I'd not anticipated was how useful the cat flap is at that level, as a way of calling the cat without having to open the door, and also, it provides a window to the garden and additional light! Also, as it comes straight onto the draining board, muddy paws are far easier to keep under control!
He also installed my Brabantia Wall Fix washing line around the back. I love this! It's half of a rotary airer that works on a cantilever system to open and close, which means it's really light so I can do it for MYSELF if I feel up to it, also it has a metal box covering it that is pushbutton to open and close and keeps the line clean. I do hate having a line that's out all the time and you have to clean it before you put pale or white clothes on it!
 |
| Washing Line Closed |
 |
| Washing Line Open |
And he took himself off to make the three offset steps for the cat to access the cat flap. I asked for them to be about the same size as a cat bed, because Ivorcat is territorial and does like 'guarding' doors and his cat flap. A day or so later, back he came to do other various jobs, and installed them. I am so pleased with them! Years ago when I lived in London there was a block of flats in Bermondsey which had what I think were individual metal steps going in between the windows to the third floor as cat steps. This stuck in my mind and when I couldn't find anything ready made online, it seemed sensible to ask for something made of ready treated decking wood by the workman who is a trained joiner as well as general handyman and plumber person at Lockwoods.
 |
| Ivor on his cat steps |
Success all round!
Utility Stage 2 - Working out what needs to live in the Utility area and arranging it so it encourages tidy and clean not chaos that's hard to clean around
In the old house, I had acquired an Ikea shoe cabinet which was inconveniently behind the bedroom door. There's no space for it in the hall for the front door in this house, because that's needed for the eventual stairlift so I can use upstairs in due course.
So my carer and I rebuilt it (well they did the rebuilding, I failed to give decent instructions and giggled a lot) and the workman attached it to the wall for me.
 |
| Installed shoe cabinet through the patio doors - nice landing strip! |
 |
| A bit untidy but not too bad... |
And I put temporary hooks up for the back door and car key, in a non visible place, well away from where anyone can reach them if they broke a window. It feels important that there's somewhere the keys live. Where you can see immediately if one is missing, and also it's easy to grab to unlock the door in an emergency. Because there's a key safe for the carers, I can't just leave the key in the door any more, well I could if I woke up before they arrived, but I generally don't.
 |
| Temporary key hooks, right place, wrong hooks. Anyway I need them eventually for pictures as that's what they are, picture hooks |
That was all finished by I think mid October. Yay me and the carers and my family and Lockwoods!
Then life and stuff caught up with me:
This is how it looks now a bare 2 months later - it works but isn't at all easy to keep clean or tidy. Nothing has a proper home! This is the respectable looking bit....
 |
| The utility sink area is cluttered with things that fall over a lot |
So the Utility, and WC area. It needs to be thought about and sorted out so that everything that needs to be in there has a place where it's easy for me to get to and take things out and put them back.
All of which is a lot of thinking and doing. So that's my Project for the Cure - getting the lean to Utility/ WC area planned if not actually actioned.
Quick Wins
I do like a quick win though! So knowing in advance I was going to tackle the utility as my Cure Project, I bought some suction caddies online.
The great thing about using the splashback (that comes in sheets and is increasingly used in the UK for showers instead of tiles), is you don't have the trouble with suction attachments that you do with tiles. Hurrah! So, as I'm rubbish with a drill (there's several holes in the WC wall oops where I thought the screw in plugs might work. No. There's bits of wood or something structural in the way. Pollyfilla is a girl's best friend!) I decided to go for suction attached caddies.
I bought a corner and a straight one in metal chromed wire and also in plastic. The metal ones for the Utility and the Plastic ones for the upstairs bathroom.
I've also bought a suction dolphin toothbrush holder and some suction animal bums & tails for using elsewhere in the Kitchen/ WC/ Utility area, and a suction shower head holder for the upstairs bathroom as sitting on the bath lift, I can't reach the lowest bit of the standard shower bar. But they've not arrived yet.
However, today as I've already done my list, I decided to install the wire caddies, and then clean the Utility sink and splashback and catflap door.
The idea is that by having the caddies, it leaves the actual edges of the sink clear for easier cleaning. It takes AGES to pick things up and put them down again if they don't have a specific home! So much easier to have caddies keeping everything off the sides.
So. It looked like this:
|
| Earlier today - stuff everywhere |
Ta da!!!!
 |
| Right now - stuff corralled into caddies |
Caddy 1 - washing up liquid, sponge, mug with dirty medicine dispensers (syringes without needles) and cat fountain brush. Also temporarily whilst I have no hot water/central heating, a jug for warm water for their food.
Caddy 2 - water measures (one cat has kidney issues they both get water with their food) - 50ml each meal and the meds for kidney for Ivor and thyroid and pain for Tabitha
which leaves ONLY the liquid soap bottle actually at the sink!
On the draining board side is an old earthenware Flour crock (bought from a junk shop in Northumberland back in the days when I went outside and did things like shopping) that I keep cat nibbles in, that is currently empty with cat nibbles in their box on the floor (doh!), and Ivor's food mat, water bowl and food bowl (on an upturned plastic box cos the cats are old so it's better for them to eat a bit higher), as well as a towel on some newspaper on the draining board to catch muddy feet from the cat flap.
Missing things from this tiny bit of the Lean To Utility and WC area are
- Double hook that workman needs to put up for me to hold a hand towel.
- A shelf for a basket that I can put the pouches of cat food in that are being used today (they eat 4 a day, plus extras at random times, I find it helps to have the right number out so I keep track of whether they've had both meals and therefore both doses of drugs) or some sort of thing - maybe another caddy? or maybe that would be a caddy too far?
- Some way of keeping the roll of kitchen towel out of the wet but also easily accessible to just grab in entirety for clearing up spills and messes.
- Use some of that magic sponge to get the weird blue scrape marks off the ceiling, or get a decorator to patch it up if that doesn't work.
As for the rest of the lean to area? there's lots to do!
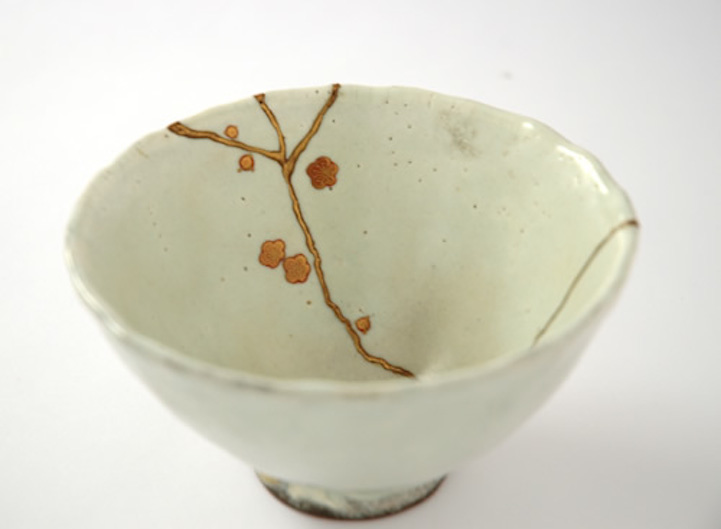 |
| Gorgeous Kintsugi from the ModernMet site has inspired my plan to use gold paint on the nicely repaired but visible cracks in the shattered WC toilet cistern |
In the main room bit (as already covered above) and also in the WC - including mundanities such as getting mirror and towel rail put up, as well as slightly offbeat weirdnesses that may not be successful, such as my plan to use gold paint to cover up the nicely glued together shattered toilet cistern lid, in an homage to the Japanese habit of repairing broken china with gold lacquer (it may not work but it'll be fun to see if it does) , but I'll save those for another time.
No comments:
Post a Comment